Why Does Paint Peel After Wall Repair?
You fixed the wall, stepped back to admire your work, and maybe even felt like a DIY champion for a moment. Then, a few days later, reality hits – the paint starts peeling like a bad sunburn. Suddenly, that smooth, freshly repaired wall looks like it’s going through an identity crisis.
So what went wrong?
Peeling paint after wall repair is surprisingly common, and it’s not just bad luck. It’s usually the result of small but critical mistakes that happen during preparation, repair, or painting. Let’s break it down step by step – with a bit of humor and a lot of practical insight.
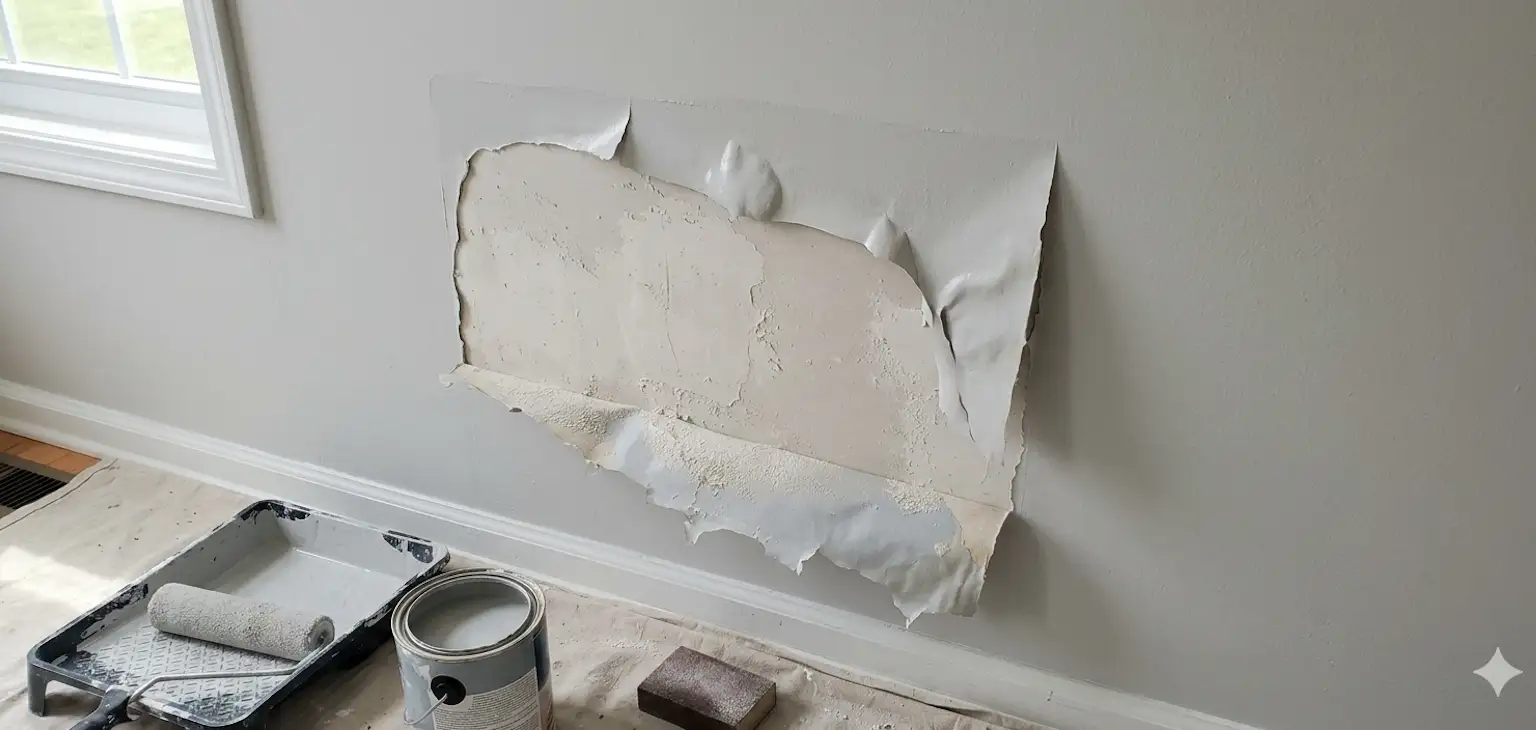
The Wall Looked Fine… But It Wasn’t
One of the biggest misconceptions in wall repair is assuming that if the surface looks smooth, it’s ready for paint.
Walls are like people – appearances can be deceiving.
After patching drywall or applying compound, the surface may look perfectly even. But underneath, there might be dust, uneven porosity, or moisture trapped inside. Paint doesn’t just sit on the wall – it needs something solid and clean to bond with.
If the surface isn’t properly prepared, the paint won’t stick well. And when it doesn’t stick, it eventually gives up and peels away.
Dust – The Silent Enemy
Drywall dust is extremely fine, almost invisible, and incredibly effective at ruining paint jobs.
After sanding a repaired area, the wall often gets a quick wipe – or worse, no wipe at all. That thin layer of dust acts like a barrier between the paint and the wall.
Imagine trying to glue something onto a surface covered in powder. It might hold for a moment, but it won’t last.
That’s exactly what happens with paint.
Proper cleaning – using a damp cloth, sponge, or even a vacuum – is essential before painting. Skipping this step is one of the fastest ways to end up with peeling paint.
No Primer – Big Problem
Here’s where many DIY projects go off the rails.
Primer might seem like an optional step, but it’s actually the foundation of a durable paint job.
When you repair a wall, especially with joint compound, the patched area becomes highly porous. If you apply paint directly over it, the surface absorbs the paint unevenly. Some areas soak it in, while others repel it.
The result? Weak adhesion and, eventually, peeling.
Primer acts like a bridge between the wall and the paint. It seals the surface, creates uniform texture, and gives the paint something to grip.
Skipping primer is like building a house without a foundation – it might stand for a while, but not for long.
Moisture – The Hidden Saboteur
Moisture is one of the most underestimated causes of peeling paint.
After repairing a wall, especially with compound or filler, it needs time to fully dry. Not just “dry to the touch,” but completely cured.
Painting too soon traps moisture beneath the surface. Over time, that moisture tries to escape, pushing the paint away from the wall and causing it to bubble, crack, or peel.
Humidity in the room can make things worse. Bathrooms, kitchens, and basements are particularly prone to this issue.
This is why professionals take drying times seriously – even when it feels like everything is ready to go.
Cheap Materials – Expensive Mistakes
Not all paints, primers, and fillers are created equal.
Using low-quality products might save money upfront, but it often leads to poor adhesion, uneven coverage, and reduced durability. Cheap paint tends to have weaker binders, which means it doesn’t hold onto the surface as well.
Similarly, low-grade fillers can shrink, crack, or fail to bond properly with the wall.
The result? A repair that looks fine at first but quickly starts to fall apart.
High-quality materials make a noticeable difference – not just in appearance, but in how long the finish lasts.
Poor Technique – It Matters More Than You Think
Even with the right materials, technique plays a huge role.
Applying paint too thickly, skipping drying time between coats, or using the wrong tools can all contribute to peeling.
For example:
– Thick coats of paint dry unevenly
– Rolling over partially dried paint can pull it off the wall
– Using the wrong type of roller can leave inconsistent coverage
Painting might seem straightforward, but there’s a level of precision involved that’s easy to underestimate.
Old Paint Can Be the Culprit
Sometimes, the problem isn’t the repair – it’s what was already on the wall.
If the existing paint is old, poorly bonded, or incompatible with the new paint, it can start peeling underneath the fresh coat. In this case, the new paint is only as strong as the surface beneath it.
It’s like putting a new layer of icing on a cake that’s already falling apart.
Proper surface preparation often includes removing loose or damaged paint before starting the repair.
Temperature and Environment
Environmental conditions matter more than most people expect.
Painting in a room that’s too cold or too hot can affect how paint dries and bonds. Extreme temperatures can cause paint to dry too quickly or too slowly, both of which can lead to adhesion problems.
Ventilation also plays a role. Poor airflow can trap moisture and slow down drying, increasing the risk of peeling.
Professionals carefully control these factors to ensure consistent results.
Why This Happens So Often in DIY Projects
DIY wall repair and painting often follow a familiar pattern:
– Fix the damage
– Sand it down
– Apply paint
– Hope for the best
What’s missing are the critical steps in between – cleaning, priming, proper drying, and using the right materials.
That’s why peeling paint is so common. It’s not because the repair itself failed – it’s because the process wasn’t fully completed.
The Professional Difference
A professional approach to painting goes far beyond just applying color to a wall.
Experts understand how surfaces behave, how materials interact, and how to prevent issues before they start. They don’t just fix visible damage – they address the underlying conditions that can cause future problems.
For homeowners considering wall painting in Calgary, working with experienced professionals means fewer surprises and longer-lasting results.
Instead of dealing with peeling paint a week later, you get a finish that stays smooth, clean, and intact over time.
When Repairs Are Part of a Bigger Picture
Sometimes, peeling paint after a repair is a sign of a larger issue.
If multiple areas are affected, or if peeling keeps coming back, it may point to deeper problems like moisture intrusion, structural movement, or outdated materials.
In these cases, a simple touch-up won’t solve the problem.
That’s where full home renovations in Calgary come into play – addressing not just the surface, but the underlying causes. A comprehensive approach ensures that repairs last and that the final finish looks and performs as it should.
Final Thoughts – Avoiding the Peeling Nightmare
Peeling paint after wall repair isn’t random. It’s almost always the result of skipped steps, rushed work, or overlooked details.
The good news is that it’s preventable.
Proper surface preparation, high-quality materials, correct technique, and patience during drying all play a role in achieving a durable finish.
The reality is simple – painting looks easy, but doing it right takes experience.
And while DIY can be satisfying, there’s a reason professionals exist. They bring consistency, efficiency, and expertise that turn a simple repair into a long-lasting result.
Because at the end of the day, a wall shouldn’t just look good for a moment – it should stay that way.