
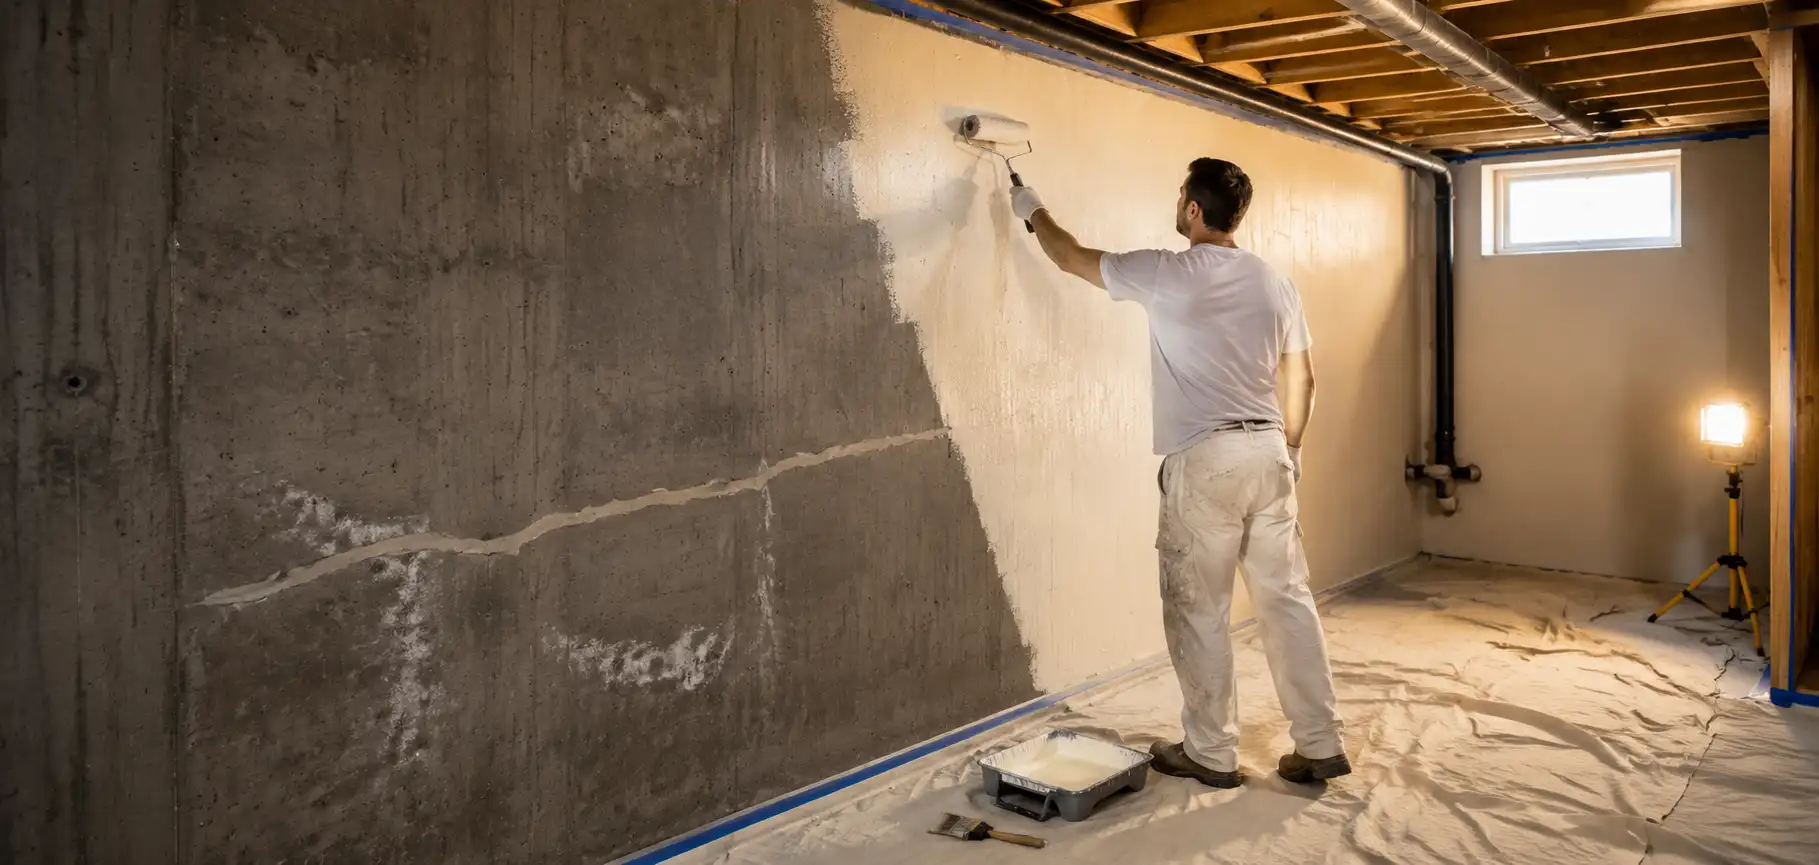

How to Paint Concrete Basement Walls?
Painting concrete basement walls can completely transform a dark, unfinished space. A fresh coat of paint makes the basement feel cleaner, brighter, and far more inviting. It can also help protect the concrete surface and make future maintenance easier.
However, concrete is not simply grey drywall with a tougher personality. It is porous, often dusty, and vulnerable to moisture. If you apply ordinary paint without preparing the surface correctly, the finish may bubble, peel, or flake long before you have finished admiring it.
The secret to a durable result is not painting faster. It is understanding the condition of the concrete, dealing with moisture, preparing the surface properly, and selecting coatings designed specifically for masonry.
Inspect the Walls Before Opening a Paint Can
Start by examining the entire wall carefully. Look for dark patches, damp areas, cracks, crumbling concrete, mould, peeling coatings, and white powdery deposits.
That white material is usually efflorescence. It appears when moisture moves through concrete, dissolves natural salts, and leaves them behind as the water evaporates. Painting directly over efflorescence is like placing a decorative rug over a leaking pipe — it may look better briefly, but the underlying problem remains.
Tape a small square of clear plastic tightly against the concrete and leave it in place for approximately 24 to 48 hours. Moisture or condensation behind the plastic may indicate that water vapour is passing through the wall. This simple test is not a complete professional moisture assessment, but it can reveal an obvious problem.
Do not paint a wall that is actively wet. First identify and correct the source, which may involve exterior drainage, grading, gutters, plumbing, foundation cracks, or condensation caused by poor ventilation.
Remove Dirt, Dust, and Old Paint
Concrete basement walls collect more dust than they appear to. Even a wall that looks relatively clean may have a loose, chalky surface that prevents primer from bonding properly.
Remove furniture and cover the floor with drop cloths. Vacuum the walls using a brush attachment, paying particular attention to corners, joints, and the area where the wall meets the floor. Scrape away loose or peeling paint with a stiff scraper or wire brush.
If the wall has already been painted, determine whether the remaining coating is firmly attached. Sand rough edges around damaged areas so the transition between bare concrete and existing paint feels smooth.
Wash the surface with warm water and an appropriate concrete or masonry cleaner. Heavy grease, residue, and stubborn staining may require a stronger degreasing product. Follow the product instructions carefully, rinse the wall thoroughly, and allow it to dry completely.
One of the most common mistakes is cleaning the wall in the morning and painting it that afternoon. Concrete can hold moisture below the surface even when it feels dry to the touch. Give it enough drying time — rushing this stage may cost considerably more time later.
Deal With Mould and Efflorescence Properly
Mould should never simply be covered with paint. The affected area needs to be cleaned, dried, and investigated to determine why mould developed in the first place. Otherwise, it may return beneath the new coating.
Wear suitable gloves, eye protection, and respiratory protection when dealing with contaminated surfaces. Large or recurring areas of mould usually indicate a broader moisture problem requiring professional attention.
Efflorescence should be removed using a dry, stiff-bristled brush or a masonry-cleaning product compatible with the wall. After cleaning, inspect the concrete again. If white deposits return, moisture is still moving through the wall, and painting should wait until the cause is addressed.
Paint can improve a basement, but it is not a waterproofing miracle in a bucket. A coating may resist occasional dampness, yet it cannot reliably stop significant water infiltration or repair a failing foundation.
Repair Cracks, Holes, and Damaged Concrete
Small imperfections become much more noticeable after painting, especially under bright basement lighting. Repairing them produces a smoother and more professional-looking finish.
Hairline cracks can often be filled with a suitable masonry crack filler. Larger cracks may require hydraulic cement, masonry repair mortar, or another specialized product. Follow the manufacturer’s instructions regarding application depth and curing time.
Pay attention to cracks that are wide, expanding, displaced, or repeatedly wet. These may signal movement or water intrusion rather than a simple cosmetic defect. Filling them and hoping for the best is not a repair strategy — it is optimism wearing work gloves.
Remove loose material from every repair area before applying filler. Once the repairs have cured, sand or brush away rough edges and vacuum the wall again.
Choose the Right Primer for Concrete
Primer is particularly important on bare concrete because it helps seal the porous surface and creates a stable base for the finish coat. Ordinary drywall primer is generally not the best choice.
Look for a high-quality masonry or concrete primer rated for interior basement applications. If the walls have persistent staining, a stain-blocking masonry primer may be appropriate. Previously painted surfaces require a compatible bonding primer, especially if the old finish is glossy or difficult to identify.
Before purchasing anything, check the labels of both the primer and paint. They should be compatible with one another and suitable for the wall’s condition. Mixing unrelated coating systems can lead to poor adhesion, uneven sheen, or premature failure.
Apply primer with a quality synthetic brush around edges, pipes, windows, and other obstacles. Use a thick-nap roller designed for rough masonry across the larger areas. A thin roller may glide over the high points while leaving tiny concrete valleys untouched.
Allow the primer to dry and cure for the full period stated by the manufacturer. Cool temperatures and high humidity can extend drying times significantly.
Select Paint Designed for Basement Walls
Concrete requires a breathable and durable coating. Masonry paint, concrete wall paint, or another product specifically approved for interior concrete is usually the safest choice. Depending on the wall and moisture conditions, a manufacturer may recommend an acrylic masonry coating or another specialized system.
Avoid assuming that exterior paint is automatically better because it sounds tougher. Exterior products are formulated for different conditions and may not be appropriate for indoor use. Always confirm that the product is rated for interior application.
A low-sheen finish often works well on imperfect concrete because it reflects less light and does not highlight every bump. Satin finishes are easier to clean but can make surface irregularities more visible. Colour also matters — soft whites, warm neutrals, and lighter greys can brighten a basement without making it feel like a medical laboratory.
Apply the Paint in Thin, Even Coats
Stir the paint thoroughly before beginning. Cut in around the ceiling, floor, corners, windows, and utilities with a brush. Then apply the paint using a masonry roller.
Work in manageable sections and roll in multiple directions to push the coating into the concrete’s textured surface. Finish each section with consistent strokes to reduce roller marks.
Do not attempt to achieve complete coverage with one excessively thick coat. Heavy application can dry unevenly and may create drips, soft areas, or adhesion problems. Two properly applied coats usually produce a more uniform and durable finish.
Maintain ventilation while working and drying, but avoid directing a powerful fan at the freshly painted wall. Rapid surface drying can interfere with proper film formation. Respect the recommended recoat time even if the paint appears dry. Paint is occasionally a liar — dry to the touch does not always mean ready for another coat.
Avoid the Most Common Basement Painting Mistakes
Many failed basement paint jobs can be traced to a few predictable errors:
Painting over active moisture is the most serious mistake. No primer or premium coating can compensate for water continuously entering through the concrete.
Skipping surface cleaning is another common problem. Dust acts as a barrier between the wall and the coating, which means the paint may bond to the dust rather than the concrete.
Using the wrong paint can also produce disappointing results. Standard interior wall paint is designed primarily for surfaces such as drywall, not porous masonry exposed to changing humidity.
Finally, inadequate drying time can undermine an otherwise careful project. Cleaners, patching compounds, primers, and paint all need time to dry or cure before the next step begins.
Should You Paint Basement Walls Yourself?
A small, dry wall in good condition can be a manageable do-it-yourself project. The difficulty increases quickly when the basement contains moisture, extensive cracks, old peeling coatings, uneven masonry, low ceilings, exposed pipes, or multiple surface types.
Professional painters can assess the substrate, identify adhesion risks, select compatible products, and complete the preparation systematically. They also have the equipment required to protect floors, fixtures, mechanical systems, and adjacent finished areas.
Hiring experienced basement painters in Calgary can be especially valuable when the walls have an uncertain coating history or the basement needs substantial preparation. The visible painting may be the final step, but the quality of everything underneath determines how long the result will last.
Give Your Basement a Finish That Actually Lasts
Painting concrete basement walls is not complicated because of the colour. It is complicated because concrete interacts with moisture, temperature, dust, and coatings differently from ordinary interior walls.
The correct process begins with a dry and stable surface. It continues with careful cleaning, repairs, compatible primer, appropriate paint, and enough drying time between every stage. When those details are handled correctly, the basement can become brighter, cleaner, and much more comfortable.
RenNew Services provides professional painting solutions for basements and other interior spaces, including surface preparation, repairs, priming, and precise paint application. Instead of spending several weekends scraping walls, studying product labels, and negotiating with an increasingly uncooperative roller, let an experienced team manage the project from inspection to final coat.
Contact RenNew Services today to request an estimate and give your concrete basement walls a clean, durable, professionally finished appearance.

About Author Illia Bespalko
Leave a Reply