
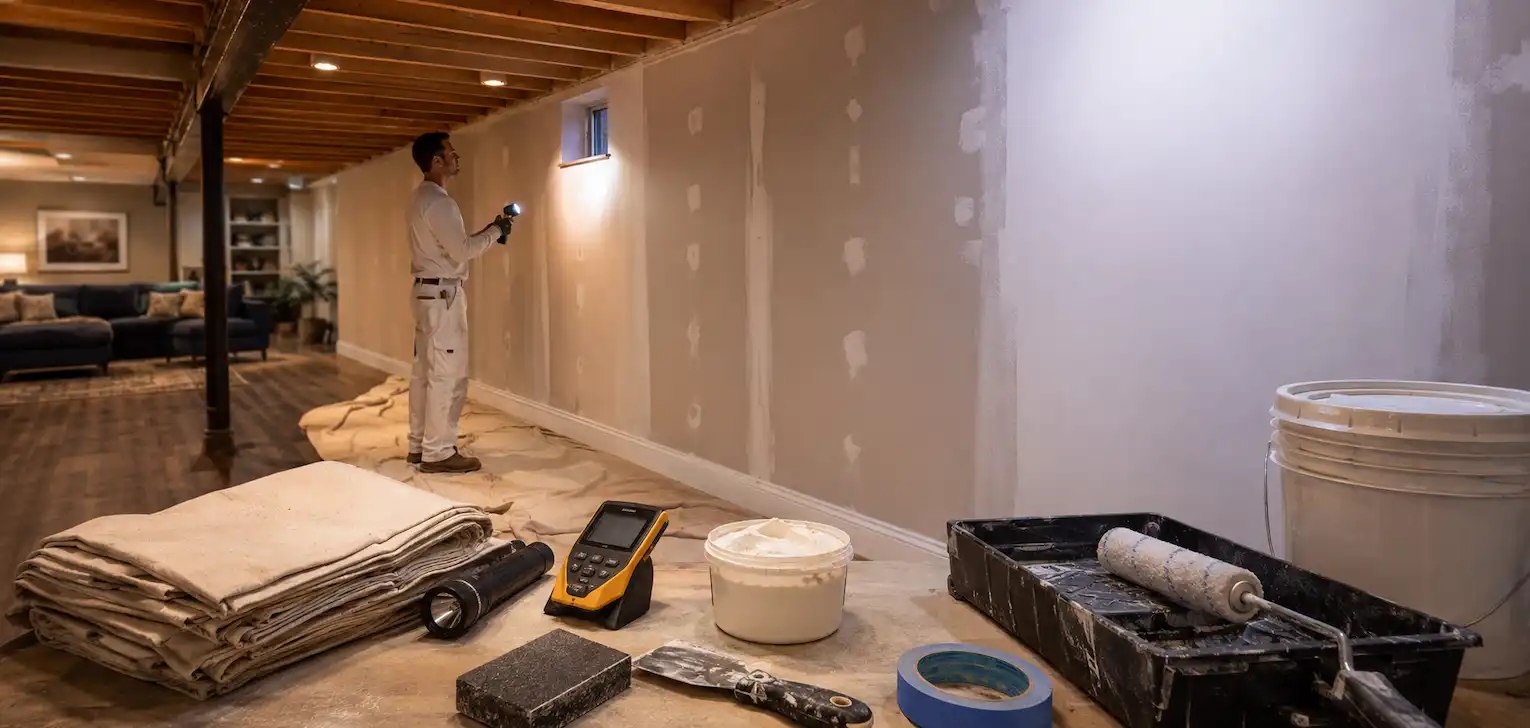

How to Prepare Basement Walls Before Painting?
Painting a basement sounds simple at first. Buy paint, find a roller, move a few boxes out of the way, and start transforming the room. Unfortunately, basement walls have a habit of hiding surprises. Moisture stains, tiny cracks, old repairs, dust, concrete imperfections, and mysterious marks left by previous homeowners can quickly turn a weekend painting project into something much more complicated.
The quality of the finished paint job depends heavily on what happens before the paint can is even opened. Proper preparation helps the new coating adhere correctly, creates a smoother appearance, reduces peeling and bubbling, and can significantly extend the life of the finished surface.
Whether the basement walls are drywall, concrete, masonry, or a combination of several materials, preparation should always come first.
Inspect the Basement Walls Carefully
Before cleaning, sanding, filling, or painting anything, take a close look at the walls.
Basements are different from most other rooms because they are located partially or completely below ground level. That means moisture can become an important factor.
Look for:
- Water stains
- Damp areas
- Peeling or bubbling paint
- Cracks
- Mold or mildew
- Efflorescence on concrete
- Nail holes
- Damaged drywall
- Previous patches
- Loose paint
- Gaps around windows or pipes
Do not rush through this stage.
A small stain can sometimes reveal a much larger issue. Painting directly over a moisture problem is a little like putting a nice tablecloth over a leaking kitchen table. It might look better for a moment, but the original problem is still there.
If the walls feel damp or show signs of ongoing water penetration, the source should be identified before painting begins.
Check for Moisture Before Painting
Moisture is one of the biggest enemies of basement paint.
Concrete and masonry can absorb moisture from surrounding soil, while leaks around windows, foundations, plumbing, or exterior drainage can introduce additional water into the basement.
Painting over damp walls may lead to:
- Blistering
- Peeling
- Discolouration
- Mold growth
- Poor paint adhesion
- Premature coating failure
One simple approach is to inspect the wall after heavy rain or during periods of changing weather. Areas that repeatedly become darker or feel damp deserve additional attention.
Professional painters also know how to recognize the difference between surface condensation and moisture entering through the wall itself.
This is one reason homeowners often choose professional basement painting services in Calgary instead of attempting to diagnose every basement wall issue themselves. Proper preparation is not only about making the wall look smooth – it is about understanding what is happening underneath the surface.
Remove Dirt, Dust, and Cobwebs
Basements are surprisingly talented at collecting dust.
Even finished basements can accumulate debris around corners, ceilings, utility areas, pipes, vents, and baseboards.
Before washing the walls, remove loose dust using a vacuum, microfiber cloth, or soft brush.
Pay special attention to:
- Corners
- Window frames
- Baseboards
- Behind shelving
- Utility areas
- Exposed masonry surfaces
Concrete walls can release fine particles that are easy to overlook. Painting over this dust can prevent the coating from bonding properly.
And yes, this is also the stage where you may discover that one spider has apparently considered your basement its private condominium for the last three years.
Wash the Walls
Once loose debris has been removed, the walls should be cleaned.
Even if a basement wall looks clean, it may contain oils, fingerprints, dirt, residue, or contaminants that interfere with paint adhesion.
For many painted drywall surfaces, mild soap and warm water may be enough. Avoid soaking drywall because excessive water can damage the material.
Concrete and masonry surfaces may require more thorough cleaning depending on their condition.
After washing, allow the walls to dry completely.
This part is important. A wall that feels dry on the surface may still contain moisture inside porous materials.
Giving the walls enough drying time helps reduce the risk of adhesion problems later.
Deal With Mold or Mildew
Dark spots on basement walls should never simply be covered with paint.
Mold and mildew need to be addressed before painting because new paint does not remove the underlying biological growth.
Small surface areas may sometimes be cleaned depending on the material and extent of contamination. Larger or recurring areas can indicate excessive humidity, leaks, or another moisture source.
The important rule is simple – do not treat paint as a mold removal system.
If moisture continues behind the new coating, the problem may return through the freshly painted surface.
Remove Loose or Peeling Paint
Previously painted basement walls should be examined for loose coatings.
Use a scraper to remove paint that is already flaking, bubbling, or separating from the surface.
The goal is not necessarily to remove every square centimetre of old paint. Stable paint that remains firmly bonded can often stay in place.
However, loose edges should be removed and feathered smooth.
If you skip this step and paint directly over unstable material, the fresh coating may look beautiful for approximately five minutes – and then begin peeling together with the old paint underneath.
That is not exactly the dramatic basement transformation most homeowners were hoping for.
Repair Cracks and Holes
Once the walls are clean, it is time to repair surface damage.
Drywall may contain:
- Nail holes
- Screw holes
- Small dents
- Joint cracks
- Damaged corners
These areas can usually be filled with an appropriate patching compound.
Concrete walls may contain different types of cracks. Small cosmetic cracks and larger structural cracks should not automatically be treated the same way.
This distinction matters.
Some minor cracks can be repaired before painting, while larger, expanding, or moisture-related cracks may require additional assessment before cosmetic work begins.
After patching, allow the repair material to cure fully according to the product instructions.
Sand the Repaired Areas
Patching compounds rarely dry perfectly smooth.
After the repairs have cured, sand the surface until the patched area blends with the surrounding wall.
The goal is not to create a perfectly polished surface. Paint generally needs a stable, properly prepared base.
Use appropriate sandpaper and avoid excessive pressure.
For drywall, over-sanding can damage the paper surface.
After sanding, remove all dust.
This is another commonly skipped step. Fine sanding dust sitting on the wall can act as a barrier between the primer and the surface.
Imagine trying to stick tape to a surface covered in flour. Technically, you can try. The results will simply be disappointing.
Prepare Concrete or Masonry Walls Properly
Unfinished concrete basement walls require slightly different preparation than drywall.
Concrete is porous, which means it can absorb moisture and paint differently.
Before painting concrete, inspect for:
- Loose material
- Dust
- Surface contamination
- Cracks
- Efflorescence
- Moisture penetration
Efflorescence often appears as a white, powdery residue. It is caused by salts moving through masonry materials with moisture.
Painting directly over heavy efflorescence without addressing the condition underneath may lead to coating failure.
Concrete should be clean, dry, stable, and suitable for the specific primer and paint system being applied.
Protect Floors, Trim, and Fixtures
Preparation is not limited to the walls.
Before priming or painting, protect everything that should remain paint-free.
That usually includes:
- Floors
- Baseboards
- Windows
- Electrical outlets
- Light switches
- Doors
- Built-in shelving
- Furnaces or mechanical equipment
- Pipes
- Finished ceilings
Drop cloths and protective coverings should be secured properly rather than simply placed somewhere nearby and trusted to behave.
Paint droplets have an impressive ability to locate the single uncovered section of flooring in an otherwise perfectly protected room.
Remove outlet and switch covers where appropriate instead of painting around them.
This produces cleaner edges and a more professional appearance.
Apply the Right Primer
Primer is especially important in basement environments.
Depending on the surface, primer may help:
- Seal porous materials
- Improve paint adhesion
- Cover repaired areas
- Reduce uneven absorption
- Block certain stains
- Create a consistent base colour
Fresh drywall, patched drywall, masonry, concrete, and previously painted surfaces may require different primer products.
Choosing the wrong primer can create problems even when the preparation itself was done correctly.
Professional painters evaluate the wall material and existing coating before selecting the primer.
This small decision can make a significant difference in durability.
Pay Attention to Basement Temperature and Humidity
Paint behaves differently depending on environmental conditions.
High humidity can slow drying, while low temperatures may affect curing and adhesion.
Basements often have different conditions from the rest of the house, so do not automatically assume that normal indoor painting conditions exist downstairs.
Good ventilation can help, but the space should still remain within the recommended temperature and humidity range for the products being used.
Always check the manufacturer’s application requirements.
Do Not Rush Between Preparation Steps
Many painting problems happen because homeowners try to finish everything in a single afternoon.
Cleaning needs drying time.
Repairs need curing time.
Primer needs drying time.
Paint coats need proper recoat intervals.
Ignoring these stages does not actually save much time if the surface needs to be repainted six months later.
Basement painting is one of those projects where patience often produces a much better result.
Why Professional Preparation Makes a Difference
The visible paint colour is only the final layer of the project.
Much of the work that determines durability happens before that layer is applied.
Professional painters know how to evaluate different wall materials, identify surface problems, prepare repairs, choose compatible primers, protect surrounding areas, and apply coatings under appropriate conditions.
They also have the equipment to complete the work efficiently and consistently.
For homeowners, DIY painting can sometimes make sense for a simple bedroom wall. Basement walls can be more demanding because moisture, concrete, previous coatings, repairs, and environmental conditions may all affect the result.
A professional approach helps prevent the classic cycle of painting, noticing defects, repairing them, repainting, discovering another problem, and eventually realizing that the basement has somehow become your new full-time job.
Final Thoughts
Successful basement painting begins long before the first coat of colour touches the wall.
The process should include careful inspection, moisture evaluation, cleaning, surface repairs, sanding, dust removal, proper protection, and the correct primer.
Skipping preparation may save a few hours initially, but it can result in peeling paint, visible patches, uneven finishes, or recurring moisture problems later.
A properly prepared basement wall gives paint the stable surface it needs to perform well and look good for years.
If the walls are damaged, previously painted, made from multiple materials, or showing signs of moisture, bringing in experienced painters can make the entire project much easier. Professionals can handle the preparation, select suitable products, and create the smooth, durable finish that turns a basement from a forgotten storage area into a clean and comfortable part of the home.
Because when it comes to basement painting, the roller gets most of the attention – but preparation is doing most of the real work.
Leave a Reply